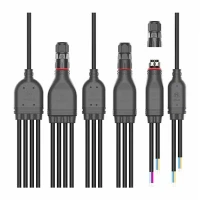
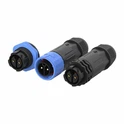
Hey there! As a supplier of Bulk T type connectors, I often get asked about how to disassemble these connectors. It's a pretty common question, especially for those who are new to working with these types of connectors. So, I thought I'd put together this blog post to walk you through the process step by step.
Why Disassemble a Bulk T Type Connector?
Before we jump into the disassembly process, let's quickly talk about why you might want to disassemble a Bulk T type connector in the first place. There are a few reasons for this. Maybe you need to replace a damaged part, like a pin or a housing. Or perhaps you're doing some maintenance on your equipment and need to access the wiring inside the connector. Whatever the reason, knowing how to properly disassemble a Bulk T type connector is an important skill for anyone working with these connectors.
Tools You'll Need
First things first, you'll need to gather the right tools for the job. Here's a list of the tools you'll typically need:
- Screwdriver: A small Phillips or flathead screwdriver, depending on the type of screws used in the connector.
- Pliers: Needle-nose pliers can be really handy for gripping and pulling out small parts.
- Wire cutters/strippers: If you need to cut or strip any wires during the disassembly process.
Step-by-Step Disassembly Process
Step 1: Power Off and Unplug
Before you start disassembling the connector, make sure the power is turned off and the connector is unplugged from any power source. This is crucial for your safety and to prevent any damage to the equipment.
Step 2: Remove the Outer Housing
Most Bulk T type connectors have an outer housing that protects the internal components. Look for the screws or clips that hold the housing together. Use your screwdriver to remove the screws or gently pry open the clips with your pliers. Be careful not to damage the housing or the clips during this process.
Step 3: Locate the Terminal Block
Once you've removed the outer housing, you'll see the terminal block. This is where the wires are connected to the connector. The terminal block is usually held in place by screws or clips. Use your screwdriver to remove the screws or release the clips to free the terminal block.
Step 4: Disconnect the Wires
Now it's time to disconnect the wires from the terminal block. Depending on the type of terminal block, you may need to use your pliers to gently pull out the wires or loosen the screws that hold the wires in place. Make sure to keep track of which wire goes where, as you'll need to reconnect them correctly later.
Step 5: Remove the Insulation Displacement Connectors (IDCs)
Some Bulk T type connectors use insulation displacement connectors (IDCs) to connect the wires. To remove the IDCs, use your pliers to gently pull them out of the terminal block. Be careful not to damage the IDCs or the terminal block during this process.
Step 6: Separate the Connector Components
Once you've disconnected the wires and removed the IDCs, you can separate the remaining connector components. This may include the connector body, the pins, and any other small parts. Take your time to carefully separate the components and keep them organized.


Tips and Tricks
- Label the Wires: As you disconnect the wires, it's a good idea to label them with a piece of tape or a marker. This will make it easier to reconnect them correctly later.
- Keep the Parts Organized: Use a small container or a tray to keep all the small parts organized. This will prevent them from getting lost or mixed up.
- Be Gentle: When handling the connector components, be gentle to avoid damaging them. Some parts may be delicate and can easily break if handled roughly.
Related Products
If you're interested in other types of waterproof connectors, we also offer a range of high-quality products, including the M27 Straight Type Waterproof Connector, the M20 T Type Waterproof Connector, and the M20 Straight Type Waterproof Connector. These connectors are designed to provide reliable waterproofing and are suitable for a variety of applications.
Conclusion
Disassembling a Bulk T type connector may seem like a daunting task at first, but with the right tools and a little patience, it's actually a pretty straightforward process. By following the steps outlined in this blog post, you should be able to safely and effectively disassemble your Bulk T type connector.
If you have any questions or need further assistance with disassembling or assembling a Bulk T type connector, or if you're interested in purchasing our products, feel free to reach out to us. We're here to help you with all your connector needs.
References
- Connector installation and maintenance guides provided by industry manufacturers.
- Personal experience and knowledge gained from working with Bulk T type connectors.