As a seasoned cable connector supplier, I understand the importance of safely removing cable connectors. Whether you're working on a DIY project, performing maintenance on industrial equipment, or simply need to replace a connector, doing it safely is crucial to avoid damage to the connector, the cable, or even yourself. In this blog post, I'll share some essential tips and techniques on how to remove a cable connector safely.


Understanding the Types of Cable Connectors
Before you start removing a cable connector, it's important to understand the type of connector you're dealing with. There are various types of cable connectors, each with its own unique design and removal method. Some common types of cable connectors include:
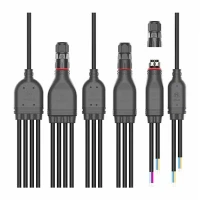
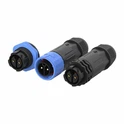
- T Molding Type Waterproof Connector: This type of connector is designed to provide a waterproof seal, making it ideal for outdoor or wet environments. You can learn more about it here.
- M15 T Type Waterproof Connector: Another waterproof connector, the M15 T Type is commonly used in industrial applications. Find out more details here.
- M15 F Type Waterproof Connector: Similar to the M15 T Type, the M15 F Type is also a waterproof connector with specific features for different uses. Check it out here.
Preparing for Connector Removal
Proper preparation is key to safely removing a cable connector. Here are some steps to take before you begin:
- Gather the necessary tools: Depending on the type of connector, you may need tools such as a screwdriver, pliers, or a specialized connector removal tool. Make sure you have the right tools on hand to avoid damaging the connector.
- Power off the equipment: Before removing any cable connector, always turn off the power to the equipment to prevent electrical shock or damage to the components.
- Inspect the connector: Take a close look at the connector to identify any visible damage or signs of wear. If the connector is damaged, it may need to be replaced rather than simply removed.
- Understand the connector's locking mechanism: Different connectors use different locking mechanisms, such as screws, clips, or latches. Familiarize yourself with the locking mechanism of the connector you're removing to ensure you can release it safely.
Removing the Cable Connector
Once you've prepared for the removal process, it's time to start removing the connector. Here are some general steps to follow:
- Release the locking mechanism: Use the appropriate tool to release the locking mechanism of the connector. For example, if the connector is secured with screws, use a screwdriver to loosen and remove the screws. If it's a clip or latch, gently pry it open using a small tool.
- Grip the connector firmly: Hold the connector firmly but gently to avoid applying too much force and damaging the cable or the connector itself. Make sure you have a good grip on the connector before attempting to pull it out.
- Pull the connector straight out: Slowly and steadily pull the connector straight out from the socket or port. Avoid pulling at an angle, as this can damage the pins or contacts inside the connector.
- Be careful with the cable: As you remove the connector, pay attention to the cable attached to it. Make sure the cable doesn't get caught or tangled, and avoid bending or twisting the cable too much.
Special Considerations for Different Connectors
Some connectors may require special handling or additional steps during the removal process. Here are some examples:
- Waterproof connectors: When removing a waterproof connector, make sure to clean the sealing surfaces to prevent water from entering the connector or the equipment. You may also need to replace the sealing gasket if it's damaged or worn.
- High - voltage connectors: High - voltage connectors require extra caution. In addition to powering off the equipment, you may need to use insulated tools and follow specific safety procedures to avoid electrical shock.
- Soldered connectors: If the connector is soldered to the circuit board, you'll need to use a soldering iron and a desoldering tool to remove the solder before you can remove the connector. This process requires some skill and practice, so it's important to be careful and follow proper soldering techniques.
Post - Removal Inspection and Maintenance
After removing the cable connector, it's a good idea to inspect it and the cable for any damage. Here's what you can do:
- Inspect the connector: Check the connector for any bent pins, broken contacts, or other signs of damage. If you find any damage, the connector may need to be replaced.
- Inspect the cable: Examine the cable for any cuts, frays, or other damage. If the cable is damaged, it may need to be repaired or replaced.
- Clean the connector and the socket: Use a clean, dry cloth or a contact cleaner to clean the connector and the socket. This can help improve the connection and prevent corrosion.
Conclusion
Removing a cable connector safely is an important skill that can save you time and money in the long run. By understanding the type of connector, preparing properly, following the right removal steps, and taking special considerations into account, you can ensure a successful and safe removal process.
If you're in the market for high - quality cable connectors, we're here to help. As a leading cable connector supplier, we offer a wide range of connectors, including the T Molding Type Waterproof Connector, M15 T Type Waterproof Connector, and M15 F Type Waterproof Connector. Contact us to discuss your requirements and start a procurement negotiation.
References
- Electrical Installation Handbook, Schneider Electric
- Connector Design and Application Guide, TE Connectivity