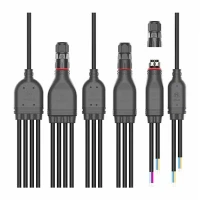
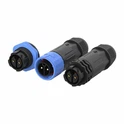
As a supplier of A16 waterproof connectors, I'm excited to share with you a comprehensive guide on how to install the A16 waterproof connector. These connectors are widely used in various industries due to their excellent waterproof performance, durability, and reliable electrical conductivity. Whether you're a professional technician or a DIY enthusiast, this guide will help you install the A16 waterproof connector correctly and efficiently.
Understanding the A16 Waterproof Connector
Before we start the installation process, it's essential to understand the different types of A16 waterproof connectors available. We offer A16 2pin Waterproof Connector, A16 3pin Waterproof Connector, and A16 5pin Waterproof Connector, each designed to meet specific application requirements. The number of pins determines the number of electrical connections that can be made, so choose the appropriate connector based on your project needs.
Tools and Materials Required
To install the A16 waterproof connector, you'll need the following tools and materials:
- A16 waterproof connector (choose the appropriate number of pins)
- Wires (sized according to the connector's specifications)
- Wire strippers
- Crimping tool
- Heat shrink tubing
- Heat gun or lighter
- Silicone sealant (optional, for additional waterproofing)
Step-by-Step Installation Guide
Step 1: Prepare the Wires
- Start by stripping the insulation from the ends of the wires. The length of the stripped section should be approximately the same as the depth of the connector's pin cavities. Use wire strippers to carefully remove the insulation, being careful not to damage the wire strands.
- If the wires are stranded, twist the strands together to prevent them from splaying out. This will make it easier to insert the wires into the connector.
Step 2: Insert the Wires into the Connector
- Identify the pin cavities in the connector that correspond to the number of wires you're using. Each pin cavity is usually labeled or color-coded for easy identification.
- Insert the stripped end of each wire into the appropriate pin cavity. Make sure the wire is fully inserted and that there are no gaps between the wire and the connector.
Step 3: Crimp the Wires
- Once the wires are inserted into the connector, use a crimping tool to secure them in place. Place the connector and wire assembly into the crimping tool, aligning the crimping jaws with the connector's crimping section.
- Squeeze the crimping tool firmly to compress the connector around the wire. This will create a secure electrical connection between the wire and the connector.
- Check the crimped connection to ensure that the wire is firmly held in place and that there is no movement or looseness.
Step 4: Apply Heat Shrink Tubing
- Cut a piece of heat shrink tubing that is long enough to cover the crimped connection and a small portion of the wire on either side.
- Slide the heat shrink tubing over the crimped connection. Make sure the tubing is centered over the connection and that there are no wrinkles or folds.
- Use a heat gun or lighter to apply heat to the heat shrink tubing. Move the heat source evenly around the tubing until it shrinks and conforms to the shape of the connection.
- Allow the heat shrink tubing to cool completely before proceeding.
Step 5: Seal the Connector (Optional)
- If you need additional waterproofing, you can apply a small amount of silicone sealant around the edges of the connector. This will help to prevent water from seeping into the connector and causing damage.
- Use a small brush or applicator to apply the silicone sealant evenly around the edges of the connector. Make sure the sealant is applied in a thin, even layer and that there are no gaps or bubbles.
- Allow the silicone sealant to dry completely before using the connector.
Testing the Connector
Once the A16 waterproof connector is installed, it's important to test it to ensure that it's working properly. You can use a multimeter to test the electrical continuity of the connector. Simply connect the multimeter probes to the appropriate pins on the connector and check for a reading. If the multimeter shows a reading, it means that the connector is working properly.
Tips and Tricks
- Always follow the manufacturer's instructions when installing the A16 waterproof connector. This will ensure that the connector is installed correctly and that it functions properly.
- Use high-quality wires and connectors to ensure a reliable electrical connection. Cheap or low-quality components may not provide the same level of performance or durability.
- Make sure the wires are properly stripped and inserted into the connector. A loose or improper connection can cause electrical problems or even damage the connector.
- If you're working in a wet or damp environment, consider using additional waterproofing measures, such as silicone sealant or waterproof tape.
- Test the connector before using it in a critical application. This will help to identify any potential problems and ensure that the connector is working properly.
Conclusion
Installing the A16 waterproof connector is a relatively simple process that can be completed with a few basic tools and materials. By following the steps outlined in this guide, you can ensure that the connector is installed correctly and that it provides a reliable electrical connection. If you have any questions or need further assistance, please don't hesitate to contact us. We're here to help you with all your A16 waterproof connector needs.
If you're interested in purchasing A16 waterproof connectors or have any questions about our products, please feel free to contact us. We look forward to working with you and providing you with the best possible solutions for your projects.


References
- Manufacturer's installation guide for A16 waterproof connectors
- Electrical wiring and connector installation manuals
- Industry standards and best practices for waterproof connector installation