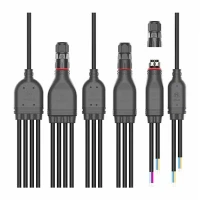
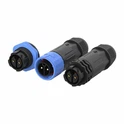
As a reliable supplier of A20 waterproof connectors, I understand the importance of providing clear and comprehensive connection guidelines for these essential components. A20 waterproof connectors are designed to ensure secure and reliable electrical connections in various harsh environments, making them a popular choice for a wide range of applications. In this blog post, I will share the key connection guidelines for A20 waterproof connectors to help you achieve optimal performance and longevity.
Understanding the A20 Waterproof Connector
Before diving into the connection guidelines, it's essential to have a basic understanding of the A20 waterproof connector. The A20 series of waterproof connectors comes in different pin configurations, including A20 2pin Waterproof Connector, A20 5pin Waterproof Connector, and A20 7pin Waterproof Connector. These connectors are engineered to provide a high level of protection against water, dust, and other environmental factors, ensuring reliable operation in challenging conditions.


Preparation Before Connection
- Inspect the Connector: Before making any connections, carefully inspect the A20 waterproof connector for any signs of damage or defects. Check for cracks, broken pins, or other visible issues that could affect the performance of the connector. If you notice any problems, do not use the connector and contact your supplier for a replacement.
- Clean the Connector and Wires: Ensure that both the connector and the wires to be connected are clean and free from dirt, debris, and moisture. Use a clean, dry cloth to wipe the connector and wires, and remove any contaminants that could interfere with the electrical connection.
- Select the Appropriate Tools: Use the correct tools for the connection process, such as wire strippers, crimping tools, and torque wrenches. Using the right tools will help ensure a proper and secure connection, reducing the risk of electrical problems or connector failure.
Connection Steps
- Strip the Wires: Use a wire stripper to remove the insulation from the ends of the wires to be connected. The length of the stripped wire should be appropriate for the connector pin, typically around 6-8 mm. Make sure to strip the wires evenly and avoid nicking or damaging the conductors.
- Insert the Wires into the Connector: Carefully insert the stripped wires into the corresponding pins of the A20 waterproof connector. Ensure that the wires are fully inserted and make good contact with the pins. Some connectors may have a locking mechanism to secure the wires in place, so follow the manufacturer's instructions for proper installation.
- Crimp the Wires: Once the wires are inserted into the connector, use a crimping tool to crimp the pins onto the wires. Apply the appropriate amount of force to ensure a secure and reliable connection. Over-crimping or under-crimping can lead to poor electrical conductivity or connector failure, so it's important to follow the recommended crimping specifications.
- Seal the Connector: After crimping the wires, seal the connector to prevent water, dust, and other contaminants from entering. Most A20 waterproof connectors come with a sealing gasket or O-ring that needs to be properly installed. Make sure the gasket is clean and free from damage, and apply it to the connector according to the manufacturer's instructions.
- Mate the Connectors: If you are using a male and female connector pair, carefully mate the connectors together. Align the pins and sockets correctly, and apply gentle pressure to ensure a proper connection. Some connectors may have a locking mechanism to secure the connection, so make sure to engage it properly.
Testing the Connection
- Visual Inspection: After making the connection, visually inspect the connector to ensure that the wires are properly inserted and crimped, and the sealing is intact. Look for any signs of loose wires, damaged pins, or improper sealing.
- Electrical Testing: Use a multimeter or other electrical testing equipment to check the continuity and resistance of the connection. Make sure the electrical connection is secure and there are no short circuits or open circuits. If you detect any problems, disassemble the connector and recheck the connection.
Maintenance and Care
- Regular Inspection: Periodically inspect the A20 waterproof connector for any signs of wear, damage, or corrosion. Check the sealing, pins, and wires for any issues, and replace any damaged components as needed.
- Cleaning: If the connector becomes dirty or contaminated, clean it using a mild detergent and a soft brush. Rinse the connector thoroughly with clean water and dry it completely before reinstalling.
- Proper Storage: When not in use, store the A20 waterproof connector in a clean, dry place away from direct sunlight and extreme temperatures. Protect the connector from physical damage and keep it in its original packaging or a suitable storage container.
Conclusion
Following the connection guidelines for A20 waterproof connectors is crucial to ensure reliable and long-lasting performance. By properly preparing, connecting, testing, and maintaining the connectors, you can minimize the risk of electrical problems and ensure the safety and efficiency of your electrical systems. If you have any questions or need further assistance with A20 waterproof connectors, please feel free to contact us. We are committed to providing high-quality products and excellent customer service, and we look forward to helping you with your connector needs. Whether you are a small business or a large industrial enterprise, we can offer the right A20 waterproof connector solutions for your specific applications. Contact us today to discuss your requirements and start the procurement process.
References
- Manufacturer's documentation for A20 waterproof connectors
- Industry standards and best practices for electrical connector installation and maintenance